 Here are some important spells you will be using a lot: (Note: I'm listing these roughly in the order that you should expect to learn them if you follow my advice.)
Note: This guide assumes some familiarity with Quest 64. There's refresher courses on some stuff and explanations on where to find some things, but I haven't been completely thorough (though I tried to give good strategy information, which was my main intent). After all, I would fairly assume this to not be your first rodeo. If this is your first time playing Quest 64, maybe rethink making it a challenge run.
If you know basically anything about the gameplay of Quest 64, you'll know that it suffers from some pretty serious imbalance. Out of the four main elements, you only ever really need two: Water for healing magic, and Earth for sheer raw damage. Just cast Avalanche on everything and it gets demolished. Sure, the first boss is painful because your attacks are all either resisted or get into his instant death radius, but after that you're on easy street. Fire and Wind tend to get absolutely lambasted as being useless - especially Fire, an element with minimal utility and spells that are primarily aimed at doing things to nearby foes.
To give these underused spells a little more love, you could try out the Fire/Wind Challenge, which is what this guide is about. In this challenge, you are barred from using the Water and Earth magic that usually break runs and must make do with the higher-risk (and not even necessarily higher-reward!) Fire and Wind magic. Your only outside-battle healing uses items. You have no Magic Barrier to fall back on; you don't even have Spirit Armor for a defensive option! Your best bet is a swingy and inconsistent evasion spell, or items that are not easily recovered. Death is not a matter of if, but when - in fact, it's more a matter of "how often," because the "when" is usually "oh, in a couple minutes, probably."
If this sounds like a good time to you, or at least one that will only hurt you in a funny way, awesome! If you need some help, that's what this guide is here for. I saw a guide to the challenge on GameFAQs (from 2005, which oughta tell you (in case it was ever in doubt) that I didn't come up with this and it's existed for a while), but I felt like it was a bit shallow. I decided to come up with something a little more in-depth, and I hope this fulfills that niche. At least enough that if you don't want to take up the challenge, you can live vicariously through my descriptions and occasional jabs at how extremely straightforward some parts of the game are.
(As a side note, I've seen one challenge more masochistic; RetroAchievements features a challenge for beating the game without opening a single chest or using any magic! I have never done this. If I get a pretty good amount of sub points on my Twitch channel, maybe I'll do it and stream it there, but I'd have to actually decide how many.)
Okay, cool, you're thinking; are there any variants? And believe it or not, yes. Look, I don't know much about Quest 64 ROM hacks, but there is a "French Vanilla" mode you can use. This is a feature included in Merrow, Hangedman's Quest 64 randomizer. To enable this, open Merrow, go to the randomizer, check "French Vanilla," and don't check to randomize anything - which, by default, it won't after you select "French Vanilla," so you should be set to go. Then you just have to patch the ROM and you're off.
You could also play the Japanese version Eltale Monsters. What does this accomplish? Why, it gives you bonus plot cutscenes at the end! Oh, yeah, and I guess it allows monsters to drop items if you have three or fewer of a given item in your inventory. That's way bigger than it sounds, actually. If you want an easier time, try that. Note that most of these fixes are in Merrow, and that will probably be easier if you don't speak Japanese.
(I don't offhand remember if the European version Holy Magic Century adds anything except a title that sounds like it belongs on a symphonic power metal album track - and as neat as that is, it won't affect the challenge level of the run.)
This is for those of you who see this and go, "well, I don't want or need a full walkthrough, I just want some basic advice for how to deal with this." In fact, even if you do decide you want the full walkthrough, this will help out quite a bit anyway, in all likelihood.
Here are some important spells you will be using a lot: (Note: I'm listing these roughly in the order that you should expect to learn them if you follow my advice.)
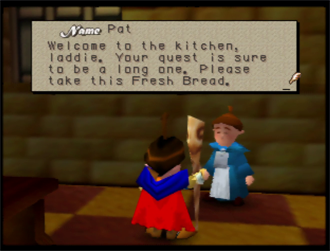 As usual, you start out in the Monastery. This area is huge but there's not much here; it's mostly set-dressing, atmosphere, or one of those terms. However, you can find two chests with two Dew Drops each. Not high-value items, but could be quite useful if you burn your MP out entirely in a battle (and you will since you will spam a crapload of 3-mana spells) and want a recharge before your next battle (and want to secure it because this game's encounter rate can be a little insane). What is high-value is Pat and his Fresh Bread. You are going to have no magical healing for a while, and later on your healing will be kind of awkward, slow, and only situational... except for healing items. Use these with great care because the amount you will have access to is limited.
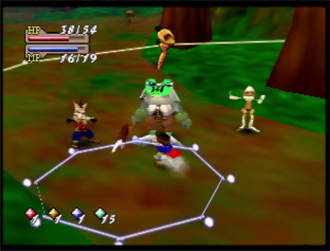
Once you go outside, pick up your first spirit in the stables. Level up Wind first and dump all of your early spirits in Wind. It might sound like a nice idea to get a head start on Fire, but you know what's nicer? Being certain that you can turn Solvaring into pudding in as few turns as possible. Trust me on this one; his short-range attack has the highest base damage of any attack in the game, which is what tends to contribute to him being such a rat bastard of a boss.
Head into town and scavenge the one free spirit hanging out in town. You can pick up the White Wings if you want, but they are not likely to be useful in this run. Then leave town and head off to the Holy Plain, and get ready to get into some fights! This area has a shockingly large amount of enemies you can encounter, with six; pretty well-stocked for a first zone.
Were Hare - 9 HP, Wind
Spells: Wind Cutter Lv1
Drops: Fresh Bread
Far and away the weakest enemy here, even their damage output is sad. Staff them for some free HP EXP. Often seen in groups.Hell Hound - 10 HP, Fire
Spells: Fire Ball Lv1
Drops: Dew Drop
Marginally more annoying because they resist your Fire magic and you will need to wait until level 4 Wind to get any non-Fire magic that deals damage worth a crap. You'll trade a little bit with them in terms of HP but you can staff them pretty freely. You'll probably see them in groups of two, but I think that's as much as you get.
Man Eater - 24 HP, Earth
Spells: Rock Lv1
Drops: N/A
Much easier than they look. Even at lower levels you can pummel them with your staff and usually be pretty safe from their rocks. Sometimes they show up in groups, in which case you should pay close attention to which one is using Rock and run toward it ASAP when it casts.Big Mouth - 28 HP, Water
Spells: Water Pillar Lv2
Drops: Fresh Bread
Finally, an enemy you should stay away from. Fireballs from a distance will take this thing down fast. Sometimes if you're far enough away it won't even try to approach! Uniquely for an enemy on this map, these only ever show up alone.Bumbershoot - 9 HP, Fire
Spells: Fire Ball Lv1, Hot Steam Lv1
Drops: Fresh Bread
Extremely frail, it's probably worth taking this down with your staff; it won't take long for you to be able to one-shot it this way. Supposedly they use Hot Steam, but I don't recall ever seeing this because they are made of wet tissue paper. Only appears with Parassault.Parassault - 13 HP, Water
Spells: Ice Knife
Drops: Dew Drop
Ice Knife does really pathetic damage. Problem is, you cannot physically dodge it. Only RNG can save you. As a result, no one strategy (get close, stay back) is better than any other here. Do what comes naturally. Only appears with Bumbershoot.
As you travel down the road to Dondoran, there are three spirits for you to pick up. Plus however many levels you get from fights here. Try to take every fight; you need all the EXP you can get. Use melee attacks against Were Hares (and sometimes other enemies if you feel like it; Man Eaters are good for this because it means you dodge rocks, and Parassault is another good target for melee because Ice Knife cannot be dodged, so staying away doesn't matter) to help build up experience for your HP stat. With so little healing available to you, enhancing your survivability is paramount. Unfortunately, nothing here is super-good for defense-grinding because everything uses single-hit attacks.
Even without healing magic, getting down to Dondoran with no deaths is not hard. You might have to eat a loaf of bread at some point, but that's fine. Dondoran has a guy at the tavern that will replace it. If you're in such a situation, that should be your first target; replenish your Fresh Bread at the tavern, then go pick up Yellow Wings. Yellow Wings are very important throughout the early part of the run, so make sure you recollect them every time you use them! In addition, there's a spirit in that big open area at the bottom of town; grab that before you go loot the castle. I forget what you can get out of there right now, but unfortunately there's no spirits yet.
Leave and go to the Connor Forest. This is a big area where you will spend a lot of time dying over and over as you keep trying to get closer to Solvaring's inner sanctum, picking up spirits as you go, of which there are five freebies, plus whatever you get from levels. Speaking of levels, to get those, you have to fight some of these guys, most of whom kind of suck. Starting in this area, enemies tend to appear mixed together. If there are notable encounters, I'll mention them as appropriate.
Bat - 24 HP, Wind
Spells: Wind Cutter Lv1, Water Pillar Lv1
Drops: Celine's Bell
They jump at you when they use their Wind Cutter spell, which is a mixed blessing because their Water Pillars hurt a bit more, but it means they solve the problem of how to best hurt them for you.Man Trap - 65 HP, Earth
Spells: Healing Lv2 (can use physical attack)
Drops: N/A
Kind of useless, but with a long physical attack range. I don't even think they can move. Just spam Wind Cutters. It's not fast, but it works. I don't think these usually appear with anything else. (Note: I've read their healing spell might be Healing Lv2, but let's be honest, the difference is academic.)Kobold - 40 HP, Wind
Spells: Fire Ball Lv1, Tornado
Drops: Fresh Bread
The real Nasty Boy of this area, Kobolds resist your wind magic and do a lot of damage. Their Fire Ball is at least vaguely dodgeable, but up-close they will use Tornado too fast for you to dodge and it will probably tear you a new back door. Worse, they resist Wind. Prepare for a drawn-out battle.Marionasty - 28 HP, Earth
Spells: Wind Cutter Lv2 (can use physical attack)
Drops: Fresh Bread
The encounter you'd most like to see. In addition to being easy to kill, they are about the best defense farm you have at this point in the game.Frog Knight - 38 HP, Water
Spells: Wind Cutter Lv2, Tornado
Drops: Silver Amulet
Silver Amulet is a pretty valuable drop, but otherwise, these are just less-powerful Kobolds. They don't resist any of your magic and they use worse spells overall.
Good news, at least, that this area has a couple of monsters you can grind for some defense EXP if you feel like getting spammed with Wind Cutters a bunch. These aren't the best defense grinds in the game by any measure, but we're early yet, so what do you expect anyway? Aside from stats, obviously you want to try to farm as many fights as you can because of element EXP. Try to get your Wind level up pretty high. At bare minimum you should get it to a level where you can use Wind Cutter Lv3, but overshooting that by a good chunk is recommended. I got to Solvaring with level 25 Wind (because I didn't run from any fights if I could help it (don't ask me how many times I died)), which is probably way more than I needed.
Once you get to the end of the path, you'll find the big man himself (the first of two big men themselves):
Solvaring - 200 HP, Earth
Spells: Flame Jet (unique), Earthquake (unique)
Drops: Earth Orb
Solvaring is a very simple guy who sets most of the basic template for every boss in the game. He has one spell he uses when he's too far away to hit you, even if he walks up to you; and one he uses when he gets up close and personal. All he's missing is buff removal. Thank goodness he doesn't have that in a normal playthrough, but here your main buff is Evade, so it doesn't matter too much.
I'm not sure if any of the boss spells have official names, so I will just have to make up nicknames for them. His Flame Jet attack is a long-reaching ray of red stuff he uses when you're far away. You can potentially dodge this by running sideways. The same is not true of Earthquake, an up-close spell where he slams the ground and a bunch of big stone spikes come out. This is the most powerful attack in the game barring a lucky Avalanche, only hamstrung in damage by Solvaring's first-boss stats. However, it is still incredibly deadly. Try not to let it get cast.
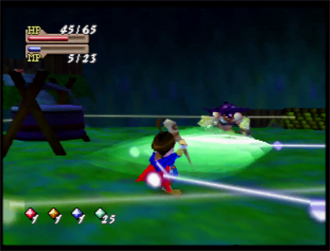
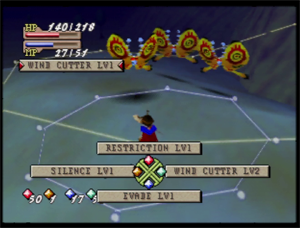
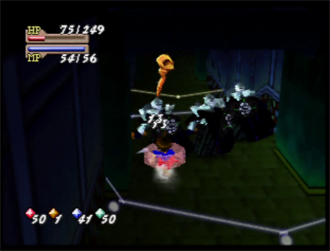
Thanks to Solvaring having all of 200 HP, you can kill him with only a few casts of Wind Cutter Lv3. Simply stand as far away as you are allowed to and let loose. Finally, an easy version of this fight! (In the screenshot I'm using Large Cutter because I'm stupid and thought it dealt more damage. I learned over the course of the playthrough, though! Large Cutter is also an option but it does want you to be closer, which is kind of a dangerous game to play with ol' wolf-hoodie guy.)
Defeating him nets you the Earth Orb! Don't forget to loot his place, then head back to Dondoran.
From this point on, put all your levels in Fire. Your Wind should be enough to severely hurt things that are best damaged by it, and the next several bosses are all either weak to Fire or, worse, resist Wind, so it would be a good idea to get crackin' on leveling that up now. Plus, your one and only healing spell is at level 32 Fire.
Replenish your Fresh Bread if needed, then go back to the castle and go behind the throne to loot a few chests and, perhaps most importantly, a spirit. Before you go, make sure your Yellow Wings are replenished. You will want to come back here later at least once to collect a spirit (and possibly even another time to replenish your Fresh Bread). But once your done, head to Connor Forest and go the other way to get to...
Bleh. Most of the enemies out here suck. Want proof? Just look at these guys:
Death Hugger - 50 HP, Wind
Spells: Ice Knife (can use physical attack)
Drops: N/A
What if a bat but large. Genius design. It doesn't approach you while casting Ice Knife, but it can freeze you in place, so you should try to set up your positioning early. Getting close can be useful, but they probably resist your only good magic right now.Mad Doll - 70 HP, Earth
Spells: Rock Lv2 (can use physical attack)
Drops: Dew Drop
I... suppose it's stronger than a Marionasty... However, it is quite easy to dodge its rocks by running into it, where it will melee attack you instead for usually noticeably less damage. Fighting these guys melee is not a bad HP grind early on.Frog King - 108 HP, Water
Spells: Large Cutter
Drops: Silver Amulet
This upgrade to the Frog Knight, which often comes flanked by his subjects, packs a real punch because his Large Cutter is grossly powerful. Stay back so you have enough time to do the necessary sideways dodges.Goblin - 83 HP, Fire
Spells: Homing Arrow Lv1
Drops: Fresh Bread
Even though Homing Arrow is a weak spell, I always feel like these guys beat the crap out of me. Maybe I just only ever encounter them at low HP or something. Anyway, use whatever strategy against these guys, just kill them as fast as possible.Apophis - 128 HP, Wind
Spells: Wind Cutter Lv2
Drops: Spirit Light
AAAAAAH! Sorry, these guys are obscenely strong so they make me scream in frustration. If you encounter a party of two, get out of there right now. These guys are too beefy, resist your wind magic, and deal too much damage. One on one it might be doable, but two on one? Not on your life. It might be worth coming back later to fight these guys, though, when you have a lot of Fire power, so you can try to farm a Spirit Light off of them, since it's a full HP recovery that will come in handy against Mammon.Cockatrice - 140 HP, Earth
Spells: Rock Shower, Avalanche
Drops: N/A
I swear this thing is real. I've only ever fought one twice and I've probably played this game at least fifteen to twenty times in my life, maybe more when you count the randomizer. It deals monstrous damage with its spells, especially Avalanche - yes, that Avalanche. Thankfully you will only ever find them in the zone just outside of Glencoe Forest, and they are weak to Wind Cutter Lv3, so they may prove to be faster fights than Apophis at this point. They're just really not worth it! I uh, think they use Rock Shower up close and Avalanche far away? Don't remember.You can also find Frog Knight from Connor Forest here, which, to be fair, you probably don't need me to tell you, provided you read the other enemy descriptions.
However, this section of the world map, combined with an optional "dungeon" (Glencoe Forest), offer nine free spirits, all of which are invaluable in our quest. So to make things less annoying, I would highly recommend going to the far south of the map to save first. Along the way, you should pick up two spirits. Every little bit helps, but the big bit requires going to a place that's a little bit outside our pay grade. But hey, it's free real estate and there isn't going to be much better of a time to go there, so once you've saved and gathered the two spirits on the main path, turn around and go back to Glencoe Forest. Don't forget to grab the third and final spirit of the Dondoran Flats overworld before you go in.
And now that we're here, let's take a look at all of the freaks we'll be running away from:
Hot Lips - 125 HP, Fire
Spells: Fire Pillar
Drops: Celine's Bell
Although they hit like a truck, you might be able to keep away from them and throw Wind Cutters as you would with most enemies. Kind of the glass cannon of the area, I guess.Treant - 160 HP, Water
Spells: Wind Cutter Lv2
Drops: Dew Drop
Water? Water?! I guess they should resist water and be weak to fire, being trees, but also, eat me, this thing looks like an Earth-element enemy. Anyway, these guys are way tanky and you don't have the tools to deal with them right now.Dark Goblin - 80 HP, Wind
Spells: Evade Lv1, Wind Cutter Lv2
Drops: Replica
Despite having the extremely useful Replica drop, these guys are kind of a pain. They crop up in large groups that are very difficult to deal with easily, they use Evade from a distance to make them harder to hit (and better at hitting you), and just in general, these encounters are not a good time with our current tools.Ghost Stalker - 75 HP, Earth
Spells: Rock Lv2 (can use physical attack)
Drops: N/A
Finally, something easy. These are basically identical to Mad Dolls but with slightly improved stats. Fitting that they drop nothing, perhaps.
Yeah... all of these guys kinda suck right now, although some suck less than others. If you can manipulate some of these fights the right way, you can probably chip a couple of these enemies down to get more EXP, but as a rule they are all more trouble than they're worth unless you get a fight with literally just Ghost Stalkers in it. As for the map, you have six spirits to find here. I don't remember exactly where any of them are, but this is mostly just a straightforward operation of "start at the lake and go along the perimeter of the walkable land throughout the area and you should find them all." Just that you'll be interrupted by encounters that are well outside your weight class right now unless you set up on them just right. If you'd really like to challenge yourself, don't use any items on these guys or run away from any of them. I mean, mostly that's a pretty good way to get your ass sent back to your last save point, but still.
(Thankfully, this game has a very good map resource that includes a map of the area. Oh hey, the chest is your first Silent Flute, which I thought you got earlier. Those are very good for securing escapes when you feel like you really need them, e.g. at the end of a dungeon and out of healing items. I used two at the end of Cull Hazard (one of which, uh, being the one at the end of Cull Hazard). Certainly a place that lives up to its name.)
Once you have finished looting the cabin and farming up all six spirits in the forest, leave and head back the way you came to the bottom of Dondoran Flats. I guess you could just death-warp if you're so inclined. By this point you should be strong enough that you can probably get away with fighting solo Apophis; this is still kind of a sucky fight, but it does have a chance of dropping a Spirit Light; Spirit Light is a pretty rare item that fully heals you, and you don't find any in chests until way later, so the value of that should be quite clear. Think of this as as close to a true sidequest as this game offers.
Get on the boat and head on to West Carmagh. Go down the path to Larapool first and pick up Blue Wings, because they will make your life significantly easier in a bit, and also the monsters here are mostly not that awful... aside from the numbers you face several of them in.
Ork Jr. - 63 HP, Earth
Spells: Rock Lv2, Spirit Armor Lv1
Drops: Fresh Bread
Like practically every Rock user you've seen so far, these guys are absurdly exploitable. Just get as close as you can and wail on them with whatever seems appropriate.
Gremlin - 83 HP, Wind
Spells: Wind Cutter Lv2, Ice Wall
Drops: Silent Flute
A surprisingly huge problem! They resist your wind magic and usually appear in large groups - as in, as many as four. Not to mention all of their spells do good damage. Not worth even trying unless you have no Silent Flutes and want another one. If you are in such a position, your best bet is that hopefully you have Fire Ball Lv3 already and can maul each of them one at a time. In smaller numbers they are not as threatening because, of course, you can simply end the fight faster.Ghosthound - 99 HP, Wind
Spells: Fire Ball Lv2
Drops: N/A
Pretty beefy for this part of the game, but not the worst thing to fight provided you keep your distance. Fire Ball casters tend to hurt up close, but if you stay back you might be able to dodge their attacks.
What's odd is that these are Wind-element and have more HP than Gremlins, but I don't find them as bad. I think they're just easier to mitigate, because they don't hit as hard and it's easier to not get hurt by them. Additionally, they tend to come in smaller groups; I think the most I've ever seen in an encounter is two, as opposed to what you can see over in the screenshot of four Gremlins.Merrow - 77 HP, Water
Spells: Ice Knife, Weakness Lv1
Drops: Replica
When they cast a spell, they push themselves backwards a little. Their damage is pretty low, so they're not hard to kill with whatever strategy. These are worth farming if you don't have any Replicas.Skeleton - 80 HP, Fire
Spells: Large Cutter, Wind Cutter Lv2
Drops: Fresh Bread
You will only find these guys on the path to Cull Hazard. As you can guess from their move set, they use Large Cutter up-close and the much-weaker Wind Cutter Lv2 from afar, so stay back when dealing with them. Honestly I'm surprised they don't try to clobber you with that big sword.Wolf Goat - 95 HP, Earth
Spells: Avalanche
Drops: Honey Bread
Another monster you can only encounter en route to Cull Hazard, and one which I think I've seen all of once ever, Wolf Goat uses Avalanche... which basically makes it a weaker Cockatrice. It's still a risky enemy to fight against, so I'd avoid it. But your odds of seeing it aren't all that high, so maybe you won't even think about it at all.Additionally, due to weird programming reasons, Were Hares show up on this map, too.
By now you should have Hot Steam Lv1, which does good damage in a... tiny AoE. But it's still useful with proper positioning. Fire Ball Lv3 also deals good damage to single targets if they're weak to Fire.
There are three spirits to pick up on the West Carmagh map, all of which are en route to Cull Hazard. Otherwise, though, this path is completely linear and it gives me very little to talk about, except hey, thank goodness there's a save point right in front of this place, because Cull Hazard is long and unpleasant even in a regular playthrough where you have rocks and healing and stuff.
Skelebat - 79 HP, Wind
Spells: Wind Cutter Lv2
Drops: Honey Bread
The only enemy that appears in the thin bridge areas at the beginning of Cull Hazard, Skelebats are pretty frail and are generally easy pickings for whatever strategy you want to use. Very rarely they might spawn out of staffing range, but not usually.
Wyvern - 310 HP, Wind
Spells: Fire Ball Lv2, Fire Pillar
Drops: Healing Potion
The big man on campus. Far and away the strongest enemy you'll fight for a while, Wyverns' HP is just disproportionately higher than anything you'll see for a long damn time. You might think this makes them more like mini-bosses or rare encounters, but no, you'll fight them mixed in with either Skelebats or Blood Jells at times, and they are shockingly common. The main mitigating factor for their difficulty in the usual game is that you are likely to have Avalanche by this point and they have unsurprisingly very large hitboxes, so you can take advantage of that... if you weren't on a challenge run. This time around, they resist what is very possibly your strongest element, making these fights an uphill battle.
On the other hand, they have a Healing Potion drop. So farming them might actually be worth it; there are chests in Cull Hazard with Healing Potions in them, so if you can kill one of these guys before you get there and get the drop, hey, that's just more Healing Potions for later. I skipped over the Apophis almost entirely because there is no special strategy for it. There is, however, a mitigating strategy for Wyverns. Very simply, they use Fire Ball at a distance, and Fire Pillar up close. They're in a category of enemies who love to close the gap, but not entirely, so when they first get in your grill, they will instead attempt to attack you with Fire Ball. They also... fly. What this means is that their fireballs come from above you. You can just run underneath them and they'll whizz right over your head and be useless; to do this, start moving toward the Wyvern. It might take a few tries to learn how to do this, and it may not even be the most perfectly consistent, but it's very similar to a lot of other "run into the rock-chuckers so they'll be totally useless" strategies you've seen already. Then after you do that, BACK THE HELL AWAY FROM THE BIG GREEN LIZARD WITH THE HUGE CHIN! If you don't, next turn they'll hit you with a Fire Pillar, which is even more deadly and is practically impossible to dodge. Do this same in-and-out dance (snrk) a few times until you rack up enough damage to bring the big stupid green thing down. Hopefully you get a Healing Potion!Blood Jell - 97 HP, Earth
Spells: Homing Arrow Lv2
Drops: N/A
What could possibly compare to the Wyvern? Not these guys, that's for sure. However, they're also pretty notable enemies because their only spell deals five weak hits. Also because I always feel like I just barely don't do enough to kill them in one hit. Sheesh... Anyway, you can fight them from wherever you feel like on the field because their attack pattern is "stand still and shoot Homing Arrows at you."Scare Crow - 120 HP, Wind
Spells: Wind Cutter Lv2
Drops: Honey Bread
I've been copy-pasting these blocks for each enemy as I go from the first enemy of each area and retooling them as I go. This guy makes me very happy because he's basically just a Skelebat that's put on weight and looks like what the editors of some Evangelical Christian newsletter would put in to try to convince you that Crash Bandicoot is the devil. They're a little burlier and have a little more HP, with their main issue being that they occasionally show up in larger groups than Skelebats... and thankfully don't show up with Wyverns.
Skelebats offer a Honey Bread drop, which is very helpful if you fail a run and end up spending all of them. Additionally, it lets you take more risks in pushing toward the exit - and yeah, needless to say, Cull Hazard is hard. Possibly one of the toughest parts of the playthrough other than Baragoon Tunnel. Secondly, Wyverns have a Healing Potion drop. I think this is technically the first Healing Potion you can get in the game if you get it before the chests, but do you want to do that to yourself? ...I mean, it is awfully valuable. Use the strategy I outlined above and don't go crazy. Lastly, Blood Jells offer a great defense grind. Not the best in the game exactly, but I've literally seen the enemy that offers the best in the game no more than twice and I'm beginning to think those were hallucinations. So it might be worth it to take advantage of this and fight Blood Jells with your staff for the slowest possible encounter. Again, don't be afraid to die because you keep your EXP.
Cull Hazard has a mere two spirits to pick up, but many treasure chests. Among them I know you can find a Healing Potion. Obviously, make sure you get that because it's going to be very, very valuable. I highly recommend doing a bit of a slow grind through this dungeon; do runs to get all the stuff before you dedicate anything more serious to actually getting out. Additionally, if possible, try to hit level 26 Fire before finishing this place out. I'll explain why in a bit, but anyone with basic math skills has probably hashed it out by now.
Upon arriving in Normoon, if you have no Fresh Bread, immediately go pick up Green Wings, then use your Yellow Wings to replenish your bread. Do not loot the windmills before you do this! Okay, now that we've got that out of the way, replenish your Yellow Wings before you leave Dondoran and return to Normoon with your Green Wings. You will probably want to keep Green Wings in your inventory throughout the game, because the NPC in the house closest to Windward Forest has free Honey Bread for you. In addition to all the windmill items, there are three spirits around town. Once you're all stocked up and saved and stuff, head into Windward Forest.
Before getting to Zelse, there are some items and three spirits to pick up. If you level-ground as hard as I suggested before leaving Cull Hazard, you will have level 32 Fire before you get to the boss. As Zelse is probably the only boss a melee strategy actually works against, having Vampire's Touch is huge. But along the way, you'll be fighting a bunch of these guys:
Ork - 198 HP, Earth
Spells: Hot Steam Lv2
Drops: Honey Bread
Melee-oriented dudes, as you've probably hashed out. Hot Steam Lv2 actually has something resembling an area of effect and it hurts pretty bad, so my advice is to simply keep your distance.Jack O' Lantern - 160 HP, Earth
Spells: Homing Arrow Lv2, Weakness Lv1
Drops: Silver Amulet
Not the ideal choice for a defense grind due to their weakness effect reducing your defense if they hit you with it at a range. But overall these guys are pretty similar to most Homing Arrow spammers, but with more HP. If there's nothing else on the field, you can just stay away and render them useless.Arachnoid - 148 HP, Fire
Spells: Magma Ball
Drops: Celine's Bell
Since they only use Magma Ball, buffs are not advised. Doubly so since most of your buffs relate to melee damage. Absolutely do not get into melee range with these guys or you will eat three hits for sure. Usually they show up in pretty large groups, or in the high-variety group that also includes Thunder Jells and some other stuff.Temptress - 132 HP, Water
Spells: Homing Arrow Lv1, Hot Steam Lv2
Drops: Fresh Bread
Speaking of "don't use melee"... Temptress is the first in a line of about five enemies (if I recall correctly) who not only float, but sway around a little while they do, which means that landing a staff attack is a matter both of aiming and timing. You really shouldn't bother because they're more trouble than they're worth. By this point, your Fire levels should be high enough that hitting them with Fire Ball Lv3 will deal way more damage than Wind Cutters will.Lamia - 220 HP, Wind
Spells: Wind Cutter Lv3
Drops: Silver Amulet
Because of how defense EXP works (i.e. you gain one point whenever you take a hit, no matter how much damage you took), the Lamia is bar none the most turn-efficient monster for grinding defense. I wouldn't recommend it now because it's pretty strong, but keep it in the back of your mind for the late game. I think they only appear toward the back of the Windward Forest and only alone, but I have seen this monster no more than twice ever, so I could be wrong and in fact I probably am.Thunder Jell - 198 HP, Earth
Spells: Homing Arrow Lv2, Healing Lv1
Drops: Honey Bread
I really don't have much I can say here because it's a beefier, slightly harder-hitting Blood Jell. But it feels pretty sturdy for this point considering non-Wyvern monsters. Staying close to this enemy will prevent it from healing, which is perfectly fine because Homing Arrow Lv2 doesn't get that much easier to dodge at a distance.Termant - 165 HP, Water
Spells: Wind Cutter Lv2
Drops: Honey Bread
Yet another in a long line of very boring monsters who just spam Wind Cutter and do nothing else. They're weak to fire so you can clean them up pretty easily.
Wow! That's a lot of different types of enemies. Seven, somehow! Yes, this is the most new enemies for a location, which is interesting. Not the most total enemy types for a location, but most new enemies. Part of this I think is because you encounter a lot of groups with many different enemies, so maybe it feels less weird - the variety of encounters isn't necessarily much higher, but the total amount of different foes is high. It probably doesn't hurt (or doesn't help, as the case may be) that there are certain enemies that are very rare and/or only appear in certain areas.
This is about the time where I really start thinking that writing this guide sucks. Quest 64, as you know, is a very linear game. There's really not a ton I can give you as advice here. Just follow the path, take fights that don't suck so you can get EXP, upgrade your stats, get the chest behind the shack, oh yeah make sure you go into the shack ... oh, hey, in all the time I was talking about that, we walked up to the boss! Pretend I did that during the perfect run where I got literally no encounters.
Zelse - 680 HP, Wind
Spells: Large Cutter, Wind Blades (unique), Wind Wave (unique)
Drops: Wind Jade
Bro looks like a human version of Silver the Hedgehog or something. Thankfully, it's not no use to resist him. I know that's a double negative but I couldn't really preserve the reference otherwise.
Zelse introduces buff removal to his attacks, but he has one very big problem with how he uses them. So, first: Zelse casts Large Cutter when you're close and uses his "Wind Blades" spell when you are far away; it's basically just Wind Cutter Lv3, but getting hit by it removes your status buffs. He also has this Wind Wave spell that is way easier to dodge; when he uses it, a horizontal wave comes at you from the side for huge damage. You can evade it by running toward Zelse, as it hits on a line a fixed distance away from him and he will not use it unless he is placed correctly for it (and he does not know how to back up, like every enemy in this game not named Merrow, so unless you move away from him you will probably never see the move).
So, here's how to deal with him: Run as close to him as you can and cast Vampire's Touch. Then close the gap further if needed and cast Power Staff Lv2. Then just wail on him with your big buff baseball bat. See, he doesn't debuff you up-close, unlike most bosses, so you can tear him to pieces with your high melee damage. This isn't a perfectly safe strategy due to the buffs seeming to last for a random duration from 2 to 6 turns. If you start dropping buffs, you should be able to re-up them and continue to get away with this strategy. If you're starting to feel the heat while your buffs are down, though, some Fire Ball Lv3 will wrap things up nicely.
Once you've broken the end of that tree limb off in Zelse's bunghole, make sure you grab the spirit right behind him. Then walk outside and use your Yellow Wings. Go to Dondoran Castle, go behind the throne, and search this room for another path. This will take you to one additional spirit. May as well refill your Fresh Bread while you're here, too.
Replenish your Yellow Wings if you think you'll bother with them again (there are no more hidden things to pick up in Dondoran Castle). If you need more Honey Bread, use the Green Wings to get back to Normoon (and pick up another set before you leave). To continue with the story, use your Blue Wings to go to Larapool. You probably don't need to recover your Blue Wings, but go for it if you want. Go into the inn, then go downstairs to get to a door to take you to the lower level of town.
To lower the water level and enter the Blue Cave, you have to enter the room with the water flowing down the walls. I kinda like how this place looks. I've since been informed, though, that you don't need to talk to Leila to lower the water level, so don't bother. Just head on down to the now dry pathway and explore around a bit. There are three spirits to get in town before you enter the Blue Cave, so check around the entire area where the water level was raised for two, then get the third at the Blue Cave's entryway room. When you have those... well, get ready for lots and lots of deaths and even more confusion. Blue Cave is possibly the easiest place in the game to get turned around in, and things hit quite hard when you first enter.
So first of all, let's have a look at what we're dealin' with here:
Scorpion - 175 HP, Water
Spells: Homing Arrow Lv2, Walking Water
Drops: Dew Drop
An enemy that's quite risky to fight. Since it's weak to water, you want to get close, but its close-range spell (Walking Water) hits very, very hard at this point in the game and is hard to dodge. Their drops aren't even good. Sucks that they seem to be one of the most common enemies here. Get close to large groups of them and use Hot Steam, or just use fireballs or magma balls at close range. It might be a good idea to place yourself such that you are only in melee range to one of them when you do this to avoid taking the heavier hits for as long as possible; watch carefully to see which one last moved.Crawler - 150 HP, Water
Spells: Water Pillar Lv2, Ice Knife
Drops: N/A
A far weaker enemy that deals good damage up-close, or uses Ice Knife from a long range - which deals very little damage but can freeze you. I have minimal commentary for this thing.Multi Optics - 175 HP, Water
Spells: Homing Arrow Lv1 (apparently using Healing Lv2 also, but I don't believe I've seen it; this can be prevented by staying close)
Drops: Dew Drop
What if Blood Jell did worse damage, had a weakness to Fire instead of Wind, and had a bunch more HP? This is like Temu Thunder Jell or something. Bizarre how weak it is compared to what we were dealing with elsewhere; these make a nice breather and a good opportunity to recover some HP with Vampire's Touch due to their low damage.Mimic - 143 HP, Water
Additionally, in the maze section you can find Skelebats (and just those). During the last walk up to Crystal Valley, you can find Blood Jells instead, with Multi Optics also returning.
Spells: Walking Water, Ice Knife
Drops: N/A
There's no actual "mimic battle" mechanics in the game, so these are just random encounters... and always encountered alone, which is silly considering their exceptionally frail HP. Up close they use Walking Water (though it seems like they'll do it from a bigger range than anything else that does it, which means you might be able to dodge it!), and from far away they use Ice Knife. By now you have the damage tools to make sure that these get very few actions, so they're probably the weakest fight here.
Disgusting. At least the Multi Optics represent a fair chance to get some Defense EXP. And if you've been following my advice about mainlining all your stuff into Fire and got Vampire's Touch before Zelse, you will have a great new DPS tool: Magma Ball. This is undoubtedly the spell I used the most outside of Wind Cutter Lv3. Get into melee range and it's pretty easy to hit a target with all three rocks. It has slightly better damage output than Fire Ball Lv3 and can even hit additional targets depending on your placement. Less importantly (but still kind of useful!), it can purge buffs on enemies! Yeah, you're gonna be using this a lot and it will turn the boss at the end of this part of the game into possibly the easiest in the game. Also, with so many enemies here being Water-element, it just does great damage in this phase of the game.
 So, before we get started, here's my very simple advice for navigating the Blue Cave if you don't want to read every single word here: Check every path. If you come to a fork and the signage points one way, go the other way first. These always occur at a place where you can turn in up to two directions. If in doubt, here are some maps that will help. They're not exact, but they're pretty close. There are a grand total of seven spirits in the Blue Cave and the Crystal Valley. Keeping a tally of how many you pick up might help.
So first, go left, away from the direction the arrows are facing. It's a heck of a walk, but your first spirit is over there. Once you get it, you can either die to warp back to Larapool to refill, or just walk back to the start of the cave. From here, start on the path with the actual arrow signs on it. After another similarly-long walk, you'll come to another branch. The leftmost path leads further into the cave, while the right-hand path is a short diversion ending in nothing. Further along this path you'll find another fork in the road, and it's the same story here as last time; leftmost path is forward, right branch leads to a dead end. Remember what I was saying before about this guide getting a bit tedious to write?
It's okay, things finally change at the next branch. From the direction you're coming, go down the leftmost branch first to a long side-path, at the end of which is a chest containing a Heroes Drink. You'll get a couple of these eventually, but they're great in the late game, so who's gonna complain about another one? (Someone who has to scroll through your cramped, clogged inventory, I guess...) When you turn around and get back to the fork, the correct path will be on your left. Once you hit another fork in the road, do the same pattern as the time before to get a spirit.
Okay, back on the main path. You'll come to a point where the tunnel opens up for a bit; in this chamber, you can find another spirit. There is a screen transition here to an area featuring a suspended rock bridge. On this screen there are no encounters, so you can take a breather, take stock of your gear, and make sure you got three spirits and a Heroes Drink. If not, time to go backwards and pick that stuff up again.
Okay, good now? Then proceed to the next screen. Ah hell, more tunnels. At least this section's pretty easy. There's only one fork in the road to go down; as always, go left for the loot, and right to move forward. This time the items are just chests.
 The right path leads to a maze, and yet it still feels like a much easier place to get through... at least to leave. Getting the items is a bit more of a pain. Also, the encounters are limited almost entirely to Skelebats, with Blood Jells taking over once you get out.
Starting out, go left at the first opportunity. At the end of this long dead end is a spirit. Go back to the split, and go straight across (i.e. right from the direction you were facing at the entrance). You'll be going down a long, twisting path until you hit another split in the road. Once again, go left and take the short, curling path to a spirit and a chest. Once more, go back and go straight at the crossing (i.e. right from the direction you were facing when you first got here... again). The path you have to take now isn't as twisty, mostly including a U-turn. You'll eventually come to another fork in the road, with a path splitting left somewhere toward the middle. Go left, then turn left again, and finally, turn right, following that dead-end to get the last spirit in Blue Cave.
There's one last item to get here. For that, go back to the place where you turned right to get to the spirit, and turn right again. Follow this to another fork in the road. Go right and do not take any turns along the rest of the path! You'll pass two places to turn (one left, one right). After that you don't really have to think anymore, just keep following the path and you'll get to the item. Now to exit the maze, turn around, skip the first turn, then go right at the second. At the next fork in the road, turn right. This should lead you to a fairly long path along the perimeter of the maze. At the turn, go left. There's a short path up to the Crystal Valley, where you can encounter Blood Jells; this is a nice place to farm your defense and HP EXP. Activate Vampire's Touch and just club them over and over; you should outheal their meager damage output easily. This can also help you recover some HP if you're low, but you're about to enter a safe zone anyway, so that's not a huge deal.
In the Crystal Valley, there's one spirit to pick up, which is your seventh and last spirit of the Blue Cave area. Before you go in the house, look around for it carefully; you'll see it on the layer just below the house, around that mound. Once you've got that, breathe a sigh of relief because you're finally done with this horrible place. Go inside and save, then take the transport to the pirate ship at the Isle of Skye.
Go into the ship and go to the lower deck. There's a spirit to pick up here. With that out the way, go out onto the island. This area is short, but it has some encounters to be aware of.
Pixie - 231 HP, Wind
Spells: Walking Water
Drops: Mint Leaves
So, I didn't say it earlier because I didn't have a good reason to expect you to have it, but Magma Ball is also a bad idea against this type of monster, and I have had difficulty landing certain moves with low-to-the-ground visuals on them anyway. Instead, use Fire Ball Lv3 for more secure damage.Grangach - 230 HP, Water
Spells: Walking Water
Drops: Dew Drop
I've seen people call this monster weird, but I think it's actually supposed to refer to something of Irish or possibly Scottish mythological origin. Regardless, it does only one thing - attempt to use Walking Water on you from fairly close, but it'll do it from far away if that's its only option. So while getting in its face can be a risk if you don't have the damage to go for a one-turn kill, by now you probably have very nearly 50 Fire (or have actually hit 50 Fire), so a one-turn kill with Magma Ball is basically secured if you can get in close.In addition, you can find Thunder Jell from Windward Forest. The most frequent encounter here on the Isle of Skye seems to be a grouping of one each of all three monsters.
Before you head up the hill, there are three spirits to get. The first one is right at the dock. Then there's one in plain sight near the fence around the cabin. The last is hidden behind the cabin, but still not well-hidden. Once you have all of these, climb up the hill; at the top, go around the edge of the stone circle to get one last spirit. That should get you to a total of five for this area. By now you should have 50 in Fire unless you've been skipping like every battle ever. If not, oh well; if so, obviously you should be diverting all your new levels to wind. Anyway, step into the stone circle and get ready for possibly the easiest boss in this entire game.
Nepty - 880 HP, Water
Spells: Bubble Shot (unique), Bubble Shield (unique)
Drops: Water Jewel
Nepty can usually be kind of a pain in a regular playthrough, but here we have the specific tools to erase her. Her spells are kind of like Zelse's, except Bubble Shot, her ranged spell, deals three hits and does not erase your buffs. Unfortunately, Bubble Shield, her melee spell, does. Sadly, there's no more melee strat hilarity for us.
Or is there? Since your Fire should now be maxed out, and by now you know that Fire excels in melee damage, we can do something funnier: just walk right up to her and hit her with Magma Ball. If you can't reach her, Fire Ball Lv3 will do just fine. You need to be in melee range for optimal Magma Ball damage, since that's the only way to land all three hits on the same target. This can kill her in as little as three casts if all hits land. Just incredible.
After inputting C-up, C-left, C-right three to four times, you'll be rewarded with what I'm pretty sure is called the Water Jewel! Most excellent. Go back the way you came, then down the hill to the cabin. Before you use the teleporter in the back, there's a spirit in that back room for you to pick up. You're really going to want everything you can get from here on (as if it wasn't already in your best interest to get literally everything you could, right?) because you're going to encounter some pretty crappy areas soon. However, you should now be outfitted with most of the most important spells in the game, so at least you have that going for you.
Step into the stone circle in the Crystal Valley and you'll teleport back to Larapool. There is no extra spirit in Dondoran Castle, but you might want to go to Normoon to replenish your Honey Bread, which still has value even as your HP is growing by a good chunk. Once you're done with that, head back to the ship (remember that?) - either use Blue Wings or go the long way if you feel like padding the run out.
Ride the ship to get to a new destination, but hold up; there's something for you to get if you do a full round trip. Ride the ship again to get to Dondoran Flats, then ride the ship again. While you're in the ship's cabin, check around for a spirit; it's embedded into the things on the right wall and is otherwise not visible. Okay, when you disembark you'll be in West Carmagh again, so you should get back on the boat to get to East Limelin. There's new monsters to fight, so let's take a quick look:
Cryshell - 275 HP, Water
Spells: Ice Wall
Drops: N/A
Ice Wall is a spell with a pretty high chance of causing freeze, and their damage output is pretty respectable (but not as severe as other new enemies in the area). Since they're Water-element, though, they're very susceptible to getting in their faces and dropping Magma Ball on them.Fish Man - 275 HP, Water
Spells: Walking Water
Drops: Honey Bread
The enemy variety feels a little lacking lately, at least in terms of their strategies. They like to get close and use Walking Water, which hurts pretty bad. But it also means they close the gap for you to throw balls at them.Caterpillar - 230 HP, Fire
Spells: Homing Arrow Lv2, Fire Pillar
Drops: Dew Drop
These guys don't mix it up strategically at all, but they do occasionally come in pretty large groups and would be a good defense grind if there weren't even better in the area. Wind attacks are the way to go here for the best damage your kit can muster, but if you have Ultimate Wind, using the larger groups of these things can be a good way to raise your MP due to its low damage, but ability to hit the entire field in one cast.In addition, you can find Blood Jells on the path south, whose lower damage makes them ideal for farming defense EXP compared to Caterpillars. Scare Crows also show up here, and I think even Wyvern will crop up in this zone! Wow, Cull Hazard monsters show up so many other places! Gotta be the place in the game where you have enemies showing up elsewhere the most out of the entire game.
 Additionally, there's a spirit to get here before going to Limelin (which you unsurprisingly want to do to get a ton of items and, of course, a save point... and this is as close to the next boss as you can save. Yeah, no, the pain is coming, folks.)
Thankfully, although the path could hardly be called short, the way to Limelin isn't incredibly dangerous. Limelin has a lot of spirits for you to get and a few chests work picking up, but no new healing item to replenish, sadly. I think you can get Heroes Drink from a guy at the tavern, but that's not as important as a Healing Potion would be. There's a spirit on the docks, one by the abandoned house, one in a wheat field, one by the jail, one in the jail, and four at the castle. Specifically, one of those four can be found behind a statue in the courtyard, two are behind the big sculpture just inside the castle, and one is two stories up, in a library; to get it, there's a tiny staircase up to a bookcase that you have to walk up. So, a whopping nine spirits in Limelin. Very lucrative.
Once you've scavenged the entire city for chests and those spirits, head back to the south. Along the way, you'll see a spirit you can't get to; the solution is just to circle around some impassable terrain. Eventually, you'll come to a big mining pit, which is your destination. But before you head down, explore the rim of the pit for another spirit. Lastly, a third spirit for the area can be found down in the pit itself and two more in the house. Unfortunately, there is no save point here! So if when you die, you're going all the way back to Limelin. At least this gives you more time to gain EXP.
So first, the monsters of Baragoon Tunnel:
Will-O'-Wisp - 160 HP, Fire
Spells: Fire Ball Lv2
Drops: N/A
A real glass cannon of a foe with high damage and laughably low HP, they sway and bob around so staffing them is hard. Instead you should just resort to Large Cutter or possibly Wind Cutter Lv3.Sprite - 242 HP, Wind
Spells: Hot Steam Lv2
Drops: Spirit Light
Not worth fighting because they are a pain to hit with Magma Ball, very dangerous up-close, and all but impossible to staff-bonk. Their being Wind element means you would probably have to Fire Ball Lv3 them twice. It's not even worth farming them for Spirit Lights when Apophis exists and is only about as inconvenient to get to.Ghost - 260 HP, Fire
Spells: Homing Arrow Lv2, Weakness Lv2
Drop: Heroes Drink
Essentially an enhanced Jack O'Lantern, they use Weakness from a distance and will cast Homing Arrow on you when you're closer by. This makes them a pretty solid defense grind if there are no Will-O'-Wisps in the fight, but also means their damage is low enough that you should be able to keep your HP sustained with Vampire's Touch and outheal them with Power Staff + VT.In addition - presumably to help keep the difficulty in check - there are Termants in the area too. They're weak to fire, as you may remember, but you should probably just equip Vampire's Touch and beat them up with your staff instead to recover some HP and get some experience in the durability stats.
This is about the point where you really start finding enemies that are just not worth fighting. With two monsters that bob and sway around, fights can get to be a pain in the ass here, either because you can whiff your staff attacks or because you can also whiff your Large Cutter even before accuracy comes into play because these dorks are bobbing and weaving like they think you're fighting in a truly strategic manner at this point. Also, Baragoon Tunnel is a bad dungeon even by the standards of this game; it's very long and it's very easy to get turned around despite being a straight shot, so you second-guess where you are all the time. The best bet is to beat every fight you get into before you reach the bridge, otherwise you have to make absolutely sure you remember whether or not you had to turn away when running from a fight.
The upside of this is that the easy encounters are very easy. By now your wind should be high enough that Will-O'-Wisps die to a single Large Cutter, allowing you to even tag multiples in a single hit. Barring bad luck, you can cast Vampire's Touch and brawl with Ghosts while sustaining your HP, and barring extremely bad luck, you can do the same with Termants and actually gain HP. These two enemies let you farm durability.
The first... lot of Baragoon Tunnel is just going forward and picking up a couple of chests. There isn't even really all that much of note except for a section with a long, thin bridge that you cannot get into any fights on. Eventually things open up into a big pit kind of like the mining pit the Tunnel's entrance was in. There's a spirit here, and not much more to make note of. The next room over is another wide tunnel, much larger than the ones you started at; over on the left is a second spirit. The hallway is pretty long, but eventually it opens up into a weird, two-level... sort-of maze room. I can't call it a maze because the solution is too simple and straightforward, but the idea is there. There are, I believe, two spirits to pick up in here. Then, at the end, we have a boss. Weirdly generic dungeon, huh?
Shilf - 1000 HP, Wind
Spells: Flock of Doves (unique), Ring Laser (unique)
Drops: N/A
Shilf's Flock of Doves spell is her ranged attack and is basically just Zelse's Wind Blades, but once again, the purge effect is moved to her short-range spell, the Ring Laser. It's... a laser beam. It seems like you should be able to dodge this, but I've never had much luck with that.
Since Shilf is a Wind boss, Fire is your best bet for damage. The ground around her is not great for just rushing straight at her, but Fire Ball Lv3 into Magma Ball once you get close is still a simple enough pattern that works as well as usual. Just try not to make inappropriate jokes as you do it.
Defeating Shilf nets you... nothing. Wow, rude! She doesn't have one of the four elemental gems. She's just kind of... here. I guess that crime against fashion she haphazardly wrapped around herself really wouldn't have pockets to rifle through for loose change. Or maybe she fell into the maze-pits before you could get to it. However, past her room there are a couple of chests and one more free spirit for Baragoon Tunnel.
You emerge from the tunnel in the Dindom Dries. If you thought the fights before sucked, things are only going to get worse from here.
Sandman - 340 HP, Earth
Spells: Magnet Rock (can use physical attack)
Drops: Honey Bread
The most durable enemy of the Dries on paper, in reality they're not so bad, and they have a secret: while their Magnet Rock is nearly impossible to dodge*, they have a melee attack. The best option is to get yourself surrounded, cast Vampire's Touch, and beat them up slowly since their melee damage is pathetic and you will easily outstrip their damage. (* Dodging Magnet Rock appears to require both diagonal movement and changing elevation, in case you are curious. So it won't come up in many battles.)Were Cat - 230 HP, Fire
Spells: Fire Ball Lv2, Fire Bomb
Drops: Dragon's Potion
So, here's why Sandman isn't as durable as his HP suggests; most other things here resist one of your two elements, meaning they aren't weak to the other, either. Additionally, this thing has very high damage output. Stay back so they will use Fire Bomb instead of Fire Ball, since you could possibly dodge Fire Bomb by running sideways. It is not easy, though.Blue Man - 245 HP, Fire
Spells: Fire Ball Lv2
Drop: Mint Leaves
Shockingly easy if it weren't for the huge numbers of them you sometimes find; they're far and away the most straightforward enemy here. Magma Ball can take them out, and should occasionally hit a few extra guys if you're against one of those particularly large groups.Nightmare - 264 HP, Water
Spells: Fire Ball Lv2, Silence Lv1
Drop: Dew Drop
A real pain in the butt; this is probably the worst enemy to fight, especially since I've seen them in groups of, like... five. They do a lot of damage up close, but when you're far away they will attempt to silence you. If that happens, it may be best to just run. Until then, stand back and pelt with wind magic in a vain attempt to make the fight not be painful.
 It might not be a bad idea to save here and then go grind your defense and HP for a bit, whether that's with Ghosts in the Baragoon Tunnel or with the desert enemies who are worth more elemental EXP (or even going back to Windward Forest and sit in front of a Lamia for however long). It's very hard to race these enemies' unrelenting fireballs with a Vampire's Touch-buffed staff, but as always, remember that dying preserves your EXP, so it may be worth it to just deal with these fights using magic. At least Sandmen are nearly free...
So here's where the quest for spirits is going to get fun (and by that I mean "really irritating"): There's a spirit out in the big square expanse of desert in Dindom Dries that I didn't find on my playthrough of this challenge. The lack of usable overworld spells makes it harder to see where it is (since using them darkens the background, making the white particles stand out more). I wouldn't blame you if you skipped it. However, you should definitely pick up a spirit in the first area of the Dries on the overworld, and the one in the save tent. From there, go down to the desert area and look for the floating thingy. This leads to a teleporter to Shamwood, where you'll find a ton of free items and spirits.
Now, by this point I assume you're familiar enough with Quest 64 to know what this place is and where all the goodies are, particularly that one spirit that looks unreachable. But just as a brief refresher, when you arrive, you'll be able to walk up a short path to the main building. But before you do that, press into the right side of that short path, along the barrier with the fires; you'll find a secret entrance that will allow you to get a spirit that's hidden near the teleporter. While exploring Shamwood, make sure you pick up everything, and get all of the nine other spirits, for a grand total of ten spirits. Very nice! Among the items in here is a Golden Amulet that can prove pretty nice against the final boss, and a fair few healing very strong items. If I recall, there's a Spirit Light in here.
Unfortunately, that breather was quite brief. It's time to head back to the main path back in the Dries. I don't really remember a ton about this area except the ruins of Greenoch, so excuse me for not having much insightful commentary here; but if you explore the area in full (I know, not exactly the most enticing proposition), there are four more spirits for you to pick up. Oh, right, and as you get closer to the Boil Hole, there's one new enemy to find:
Magma Fish - 242 HP, Fire
Spells: Magma Ball, Spirit Armor Lv2
Drops: Mint Leaves
Although they often show up in large packs - as many as four! - Magma Fish are very easy; just stay away from them! They might Spirit Armor to pad out the length of the battle some, but who even cares? Just keep spamming Wind Cutter. As long as you're far enough away, they will not cast Magma Ball on top of you so you can avoid the triple hit; Magma Ball is quite easy to dodge if you're not getting hit by the triple.
Shockingly a pretty safe fight for this point in the game. That'll take the edge off while searching for those spirits. Once you're done navigating this treacherous terrain, head into the Boil Hole, where you will meet a lot of one old enemy, and a few new ones:
Red Wyvern - 550 HP, Fire
Spells: Homing Arrow Lv2, Fire Ball Lv3
Drops: Healing Potion
Absolutely disgusting amount of HP on this dude. I usually don't fight them, but they are much riskier than regular Wyverns due to the fact that they use Fire Ball Lv3 in your face to do huge damage. Thankfully their Homing Arrows are not as bad. They drop Healing Potions but it matters less than it did for the regular Wyverns in Cull Hazard. Compared to those, I'm not going to go into much depth with these guys because they're not really worth messing with, and if you decide to anyway, the strategy is much more straightforward.Flamed Mane - 360 HP, Fire
Spells: Fire Bomb, Hot Steam Lv2
Drops: N/A
Seems like a pretty rare encounter and one I can only ever remember encountering solo; these guys are easily handled by using long-ranged Wind Cutter attacks and running sideways to dodge their Fire Bombs. The dodge isn't necessarily reliable, but you can't dodge Hot Steam, so it's preferable to have a chance at all.Rocky - 350 HP, Earth
Spells: Rock Lv3, Rock Shower
Drops: Honey Bread
Rockies are miniature variants of Sandmen, who instead approach you if you're far away, using Rock Lv3 at a medium distance or Rock Shower up close. As with most Rock-throwing enemies, the strategy is of course to get as close as possible. Rock Shower's damage is rather pitiful, so you can possibly even outheal it with Vampire's Touch (though Power Staff of course helps for this.Plus, as you guessed, Magma Fish and, as you might not have guessed, Nightmares.
Boil Hole is another pain in the butt because of most of the enemies not being weak to your spells anymore, but a lot of these are returning enemies. Rockies are weak to wind, but much more easily handled with melee due to their hilariously poor up-close damage. Flamed Mane tends to appear alone, which means it gets mauled by Wind Cutter Lv3.
This dungeon is practically one linear path with a minimum of deviation in width. Oh, so you turn a little bit once in a while. Wow. Uh, I don't have a lot of commentary here, except to say this. I've been using a guide to help me remember where the spirits and such are. Its description of the first spirit in Boil Hole is wrong. It's actually near the second instance of chests in this dungeon, I believe.
At the end of it, you'll come to the big man himself, Fargo. He of the Big Shoulders. He's intimidating-looking, and a huge step up in durability from previous bosses. Does that make him any harder, though? Well... let's have a look.
Fargo - 1500 HP, Fire
Spells: Flame Shot (unique), Eruption (unique)
Drops: Fire Ruby
Fargo's Flame Shot is basically a standard linear attack, but it happens very fast and has a bigger hitbox than it looks like it should have; I had so much trouble dodging it by running sideways that eventually I just gave up and stood still. Surprise surprise, the Eruption move is an up-close ground slam that purges your buffs, which you've seen basically everyone use up to this point.
Fargo ushers in the new boss strategy that you'll use for the rest of the game by virtue of his resistance to fire and strong up-close damage. And by "new strategy," I mean "it's exactly the same strategy you used against Solvaring, but you've been so focused on melee and short-range magic for so long that it almost feels new." Simply stay as far away as possible and spam Wind Cutter Lv3 because it will be your most damaging spell in this fight. Because he isn't weak to this, and because his HP is a huge step up from the previous two bosses (and your magic damage growth is already starting to level off hard), this is much more of a battle of attrition than any boss you've fought in a while. If he gets up close, he deals more damage and removes your buffs. Not much to say here except that this is a bellwether for what the rest of the game looks like (i.e. kind of terrible). Because he dispels only up-close, you may use a Silver Amulet if you wish. Don't use the Gold Amulet, though.
(Also it's hard to see in my screenshot here because it's scaled down to prevent this page from being unusable, but Fargo has an amazingly sour puss. His face looks like he's been eating nothing but lemons for about five years straight.)
Once you've beaten him, you get the Fire Ruby! Finally, it feels like things are coming together a little. Remember to check the area for one last spirit and be on your way.
When you emerge from the Boil Hole, you'll be on Baragoon Moor. Any relation to the tunnel? ...I forget. Anyway, get to that building. There's a spirit behind it, and a spirit inside. But more notably, this is a save point! It probably feels like it's been a while since there's been a new one, huh? Well... it honestly hasn't, but because you branched out in a lot of directions recently, it feels like it. Let's take a quick look at what enemies we'll fight here before we enter a dangerous zone, by the way:
Winged Sunfish - 320 HP, Wind
Spells: Walking Water (apparently also uses Fire Ball Lv2, but I've literally never seen this as far as I can remember)
Drops: Honey Bread
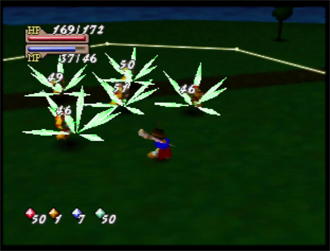
Ah, I see, all the Momora Moras I desynthed after every ocean fishing session have come back for revenge. This is a pretty simple enemy who uses Walking Water on you from a modest distance. Fire is your best bet, plus, since they rarely appear alone, Hot Steam can probably catch a few more enemies in its AoE.Gloom Wing - 320 HP, Fire
Spells: Fire Pillar, Weakness Lv2
Drops: Dew Drop
These guys just feel like one of the worst enemies in the area, and I'm not entirely sure why. But as usual, you want to keep your distance from them because they have an extreme close range spell and a debuff.Ogre - 440 HP, Water
Spells: Fire Ball Lv3, Fire Bomb
Drops: Giant's Boots
To best deal with these guys, you want to get in close after their first turn and then burn them up with your fire magic. You probably won't be able to one-turn them. I forget if this enemy has a melee attack; a later monster that has a very similar model and animations does, though, as we'll see later in the guide.Red Rose Knight - 260 HP, Fire
Spells:Large Cutter, Evade Lv2
Drops: Mint Leaves
There are two varieties of Rose Knights here, and these are the more annoying ones by far. Up close they use a brutal Large Cutter, but far away they use Evade Lv2. The best way to deal with them is to stay far back and pelt them with Wind Cutters, hopefully far enough back that they won't think to approach you. It can happen! The fight will always be annoying because of the Evade effect, but this is still probably the best way to do it. They do, however, frequently appear in groups, sometimes mixed in with the other Rose Knights, so throwing Large Cutters to those groups can work wonders. This might be very useful in a place with many thin hallways, hint hint.White Rose Knight - 299 HP, Fire
Spells: Homing Arrow Lv1, Spirit Armor Lv2
Drops: Honey Bread
Much easier than the Red Rose Knights, even with their much greater HP. It seems like they attack from farther away, too, but maybe that's just me. Using Vampire's Touch with your staff may not necessarily make these fights free (i.e. you might not sustain your HP without the equivalent attack boost), but you can still make them pretty easy. As before, throwing Large Cutter at big groups in condensed places can help make the fight a lot easier.Rockies also show up here, doing rock things.
 Head forward. As you reach the gates of Brannoch, you'll see a bunch of places you can go on the raised ground. There are three branching pathways in total, each with one spirit. With that, it's time to enter Brannoch... and then pass right through. Town only has anything of value if you want to grab what I think are called the Black Wings in case you decide you really want to go grind defense or you just have to get another Heroes Drink because you somehow used all of them. I somehow don't imagine you'll end up in that position, but the thing about video games that's cool is that everyone plays them differently. Regardless, move on to the castle. You of course can't go in the castle's front gates (imagine how well-defended that way is anyway; I bet that's where they keep the Celtland equivalent of Warmech), so you have to go around to use the service entrance. But make sure you go past it when you're en route; there's a spirit up there.
Okay, fine, I think Brannoch Castle might be the worst part of the game. Certainly the most boring to play, and least interesting to write about. It's just a bunch of very samey straight hallways with occasional 90 degree turns. There are only two enemies here, the two types of Rose Knight. Keep your distance from the red, but you can close in on the white to farm HP with Vampire's Touch and Power Staff Lv2. At two points you'll see doors on the side of the wall. Go in those; each has a spirit, and there are some chests and stuff, not to mention a save point further up. Just the driest possible content for this game. I don't think Quest's reputation as a bland game is entirely deserved, but this part really makes you feel it. Maybe at least a third enemy type would have done something. Maybe a guy toting a cannon that could use Rock Lv3 to simulate the cannon fire? Or some kind of dark mage? The sheer amount of spells that go unused by enemies in this game is weird. I don't think anything uses Water Pillar Lv3, nor any of the Rolling Rock spells. Certainly not Magic Barrier, which... er, maybe that's for the better.
Eventually you'll come to a big room. That means, you guessed it, time for the second hardest boss in the game!
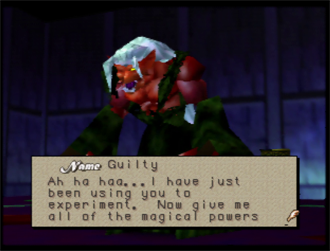
Guilty - 1800 HP, Null
Spells: Guillotine (unique), Ground Punch (unique)
Drops: N/A
Guillotine summons two blades on either side of you that strike you for what is all-but-guaranteed damage... for only one hit, despite the graphics. I've never been able to dodge it, and the accuracy is pretty good. Ground Punch causes Guilty to punch the ground (yes, my nickname for this move is so creative, I know) and create a shock wave that deals way more damage than the other attack does, and as always, purges your buffs.
Guilty is... special. Namely in that he resists all elements. Obviously, though, damage-racing him at melee range is a profoundly stupid idea, for those of you who suddenly had that idea. You won't be able to keep buffs from Power Staff or a Golden Amulet and he will do too much damage per hit for you to not basically burn through all of your Healing Potions. So, y'know, don't do that. Just run away from him around the edge of this extremely small arena and spam Wind Cutter Lv3. If you wish, throw on a Silver Amulet. As long as you keep your distance, he will not get close enough to dispel it, so it can cut down how much damage you take by a reasonable amount.
This is the first time in the game where I had to actually use an MP item on a boss, and that might prove to be the case for you, too. If it comes up, just use a Heroes Drink. You'll probably have enough Dragon's Potions for a playthrough even if you use one here, but the Heroes Drink should be enough to get the job done.
After that harrowing experience, you may as well go back and heal. It's more corridors for you after that, though! Eventually you reach the room where the plot starts to show back up after just kind of being just... dimly off in the background haze for a bit. You don't actually have to talk to any of these goofballs, though. No, no, that's for later. Just keep going until you find another boss.
Beigis - 1900 HP, Fire
Spells: Death Ray (unique), Sword Beam (unique)
Drops: N/A
Beigis's Death Ray is a huge green laser that you shouldn't even think about dodging, but it might be theoretically possible if your agility is stupidly high and you move sideways. Sword Beam is what he uses up-close, where he'll charge and slash, launching a vertical cutter. This operates kind of like Shilf's dumb melee laser in that it hits so fast and at such short range that dodging it is more or less impossible. It also, of course, removes your buffs.
I'm kind of in awe as to what a massive downgrade in challenge Beigis is compared to Guilty. He hits harder, but so what? For a start, he actually has an elemental affinity, so you'll hit him much higher. In exchange, he has a worse arena and a counterintuitive strategy where you actually want to get closer to him. Yeah, for some reason, Bagel deals less damage with his sword beam than with his big stupid nuclear pain laser, so now you're getting up in his grill with something intended more for long-range combat. Er, sure. If you were using water magic he'd be so screwed with this. Also he barely has more HP than Guilty, which, due to his poorer defensive profile, once again means he dies faster for some reason, unless you literally only use fire magic on him. Which you should not do! Even when you enter melee range, use Wind Cutter exclusively.
Beyond this, I don't know if there's anything special to say about Bepis. Uh, his arena is a weird shape? I assume this is to slow you down from getting into his face so easily. Which I suppose is fair enough, but... yeah, that's about all he's got. Oh, wait! Because you're at short range, you can't put Silver Amulets to much use, except during the approach. (And especially don't bother with a Golden Amulet.)
Okay. From this point forward in the castle, things are safe. But you will have to talk to Shannon next time you see her to get the Eltale Book. Once you do that, just keep on goin' until you reach...
Okay, let's take a look at the enemies here first. Most are quite intimidating! But there is some valuable strategic information to be had when it comes to most of these pricks.
Judgement - 322 HP, Earth
Spells: Rock Lv3, Rock Shower, Fire Pillar
Drops: Golden Amulet
Among the few monsters blessed with access to three attacks, Judgement is an enemy that is very effective at all ranges... and can only rotate, not properly move. Your best bet is to get close to it but not melee range. At melee range it casts Fire Pillar, which is devastating. Outside that range it will either cast Rock Shower - as weak as always - or Rock Lv3, which is dodged in the same way as always. In groups of multiple Judgement and nothing else, it is much easier to simply put on Vampire's Touch, and melee them in the order they attack in. This should keep you out of range of the deadly Fire Pillar. (Just be careful you don't run into the Fire Pillar! I've done that and it made me feel really, really stupid.)
These guys are also worth farming for their Golden Amulet if you have somehow used all of yours, which I don't think is a good idea to have done. (Or, alternately, if you are playing Eltale Monsters, you get drops if you have less three of an item, so it might still be worth it. I highly doubt you will need three Golden Amulets for Mammon, but why not, right?)Pale Rider - 480 HP, Wind
Spells: Cyclone, Large Cutter
Drops: Healing Potion
No, game, that's just a horse. Much like real horses, they are strong and downright terrifying; I would suggest just running from them and not even thinking about anything else. I don't remember the attack pattern offhand aside from them probably using Large Cutter up-close, because fighting them is an extremely painful endeavor.Pin Head - 580 HP, Fire
Spells: Fire Ball Lv3 (can use physical attack)
Drops: Celine's Bell
Unlike so many other monsters, I can vouch for the fact that these guys use Fire Ball Lv3, and it hurts like hell. It is bar none the most damage you will take from an attack in the entire game, as far as I know... but this monster does have a pretty serious weakness. When it casts its spell, get closer before it attacks again. No, I'm serious! They have a melee attack. Their Fire Ball Lv3 will do over a third of your HP if all three connect; the melee attack barely does 30. From there, just buff your staff and go into melee mode. This isn't a bit! It's absolutely hilarious that this enemy is susceptible to this strategy. But I guess it being unexpected is how they make this a hard fight, or something.Spriggan - 462 HP, Water
Spells: Silence Lv1 (can use physical attack)
Drops: Heroes Drink
I've saved the simplest for last. Spriggans can only cast Silence and attack you with melee attacks. To deal with them, simply get close and either beat on them or spam Magma Ball. Personally I prefer the method of getting close and using Vampire's Touch to outheal their melee damage, which is as crap as any other enemy's. For all their burl, they seriously only hit you for less than 30 damage. The funniest part is I've seen this melee attack outright miss. As in, it didn't even connect physically, so it couldn't roll accuracy in the first place.
Okay. Mammon's World is big, long, and full of deranged, psychedelic takes on some existing environments. Past this point, there are no items nor spirits to find, so you can freely bull-rush the ending... which is the approach I most recommend taking. The only item to even bother farming for at this point is maybe a Golden Amulet from Judgement, assuming for some reason you've used foth of the ones that are available elsewhere. Celine's Bell does not work on Mammon at all. In fact - and I didn't find this out until the final boss - you can't actually use debuff items on bosses at all!
After the first room, the next two rooms are completely safe. The long twisting path is... long and twisting, but too thin to spawn enemies. The next room is a copy of the one right before the princess's chambers in Dondoran Castle. Since it's an inside room, I guess that's why it doesn't spawn anything. The next room is, however, a place where you can fight enemies. Go up the incline to the next room, which is like a forest area but with a bloody pool. After this is another inside room, so take a breather. This is followed up by another open-ended room, then another forest-y room... just with less blood-water. Then you get some more safe rooms; the first is a ship map, then another set of thin pathways.
SAVE YOUR GAME HERE. Seriously. Mammon is a hard fight and might take a few tries to pull off. Moreover, this will allow you to recover your items after you die, since you will likely be using a lot of items during the Mammon battle.
Just a little more to go. The next screen is a haunted version of Melrode. I wish you could get fights here! I'd love to just... fight in a messed-up city. Go to the door on the east side of town. There is one more forest screen in case you want to grind levels for some reason. On this last screen, just go talk to Shannon and she will teleport you to the boss. Walk up the path and get ready for pain...
Mammon - 2300 HP, Null
Spells: Sun Strike (unique), Flame Wall (unique), Countless Arrows (unique)
Drops: N/A
Mammon is one of only two bosses with three moves. Not sure why but here we are. They're pretty odd, too. Sun Strike is a move that hits you no matter where you are and purges your buffs. With Flame Wall, Mammon shoots out a wave of fire pillars that radiate from him in a roughly quarter-circle formation. What this means is that the further you are from him, the easier they are to dodge and especially the less likely you are to get hit by multiples. The same cannot be said about Countless Arrows, where he launches what I think are eight shots all in a tight cluster. Odds are that you're getting hit by all of them if you get hit by one, and not just for the hit-stun; more because they're just that close together.
There's a bit of a problem with me trying to write a strategy here, which is that I don't actually know what determines what he'll use. It seems like it doesn't actually matter too much to him, and maybe that makes sense because he has only one skill that can easily be dodged. So my suggestion is to stay somewhere on the curved path near him (but not at the place where you can bonk him) and stay as far back from him as possible.
At the start of the battle, use one of your Golden Amulets because it will help you take less damage. Depending on what he feels like doing, it might not matter in the long run, but every little bit helps. Then, of course, the best method of dealing with him is to spam Wind Cutter Lv3. The damage output is overall higher than that of Fire Ball Lv3, which would otherwise be your best move in this position. Use items as needed. If he removes your defense buff, go ahead and reapply it if you feel like it (assuming you have another Amulet still).
It might take a couple tries, but if you're doing this challenge, you're used to that already. As I alluded to, this is the rare time when I would advocate reloading if you die in a fight, because those items cannot be fully recovered after the fact. If you are still having trouble, simply reset and use no items, and grind for a while. You are still playing an RPG, and barring a select few RPGs that expect you to be at max level at the end (isn't the original Phantasy Star like that?), you can usually solve any trials you are having with them by just level-grinding harder.
When you defeat Mammon, rejoice! You have completed one of the hardest challenges available in Quest 64, and probably the hardest any sane individual would willingly engage in.
(Most if not all of these were linked earlier, but just to keep things all in one place...)